Sphinx Tips
Sphinx directives
https://www.sphinx-doc.org/ja/master/usage/restructuredtext/directives.html
githubpagesで利用可能とするためには:
Makefile (files直下にある). make htmlコマンドで、sphinx buildの代わりにautobuildを設定している。ctrl - Sで都度手元でビルドできるようにしている。–host 0.0.0.0 –port 8000 の設定については、docker側のportとローカル側のportの対応関係を規定している。ローカルのブラウザでhttp://localhost:8000/でアクセス可能となる。¶1 # Minimal makefile for Sphinx documentation 2 3 # You can set these variables from the command line, and also 4 # from the environment for the first two. 5 SPHINXOPTS ?= 6 SPHINXBUILD ?= sphinx-build 7 SOURCEDIR = . 8 BUILDDIR = ../docs#_build 9 10 # Put it first so that "make" without argument is like "make help". 11 help: 12 @$(SPHINXBUILD) -M help "$(SOURCEDIR)" "$(BUILDDIR)" $(SPHINXOPTS) $(O) 13 14 .PHONY: help Makefile 15 16 # Catch-all target: route all unknown targets to Sphinx using the new 17 # "make mode" option. $(O) is meant as a shortcut for $(SPHINXOPTS). 18 # $(SPHINXBUILD) -b html $(ALLSPHINXOPTS) $(BUILDDIR)/ 19 %: Makefile 20 # @$(SPHINXBUILD) -b $@ "$(SOURCEDIR)" "$(BUILDDIR)" $(SPHINXOPTS) $(O) 21 sphinx-autobuild -b $@ "$(SOURCEDIR)" "$(BUILDDIR)" $(SPHINXOPTS) $(O) --host 0.0.0.0 --port 8000
Pandocコマンド
コンテナを作成して、build, srcなどはvolumeとしておいておく
srcだけはvolumeでマウントさせておく? githubでコミットするsrc…などはおいておきたいし.. makeもおいておきたい。https://qiita.com/supaiku2452/items/5d6e78d10094f64d269f が参考になるかも。テストでは例えば、graphvizをホストマシンからアンインストールして、そのあと、
rstでは#を用いたナンバリングはインデントが大事。端末の設定にもよるが、2回インデントしないと1.からスタートにリセットされる場合もある。
Jupyter executeモジュール(jupyter-execute)。
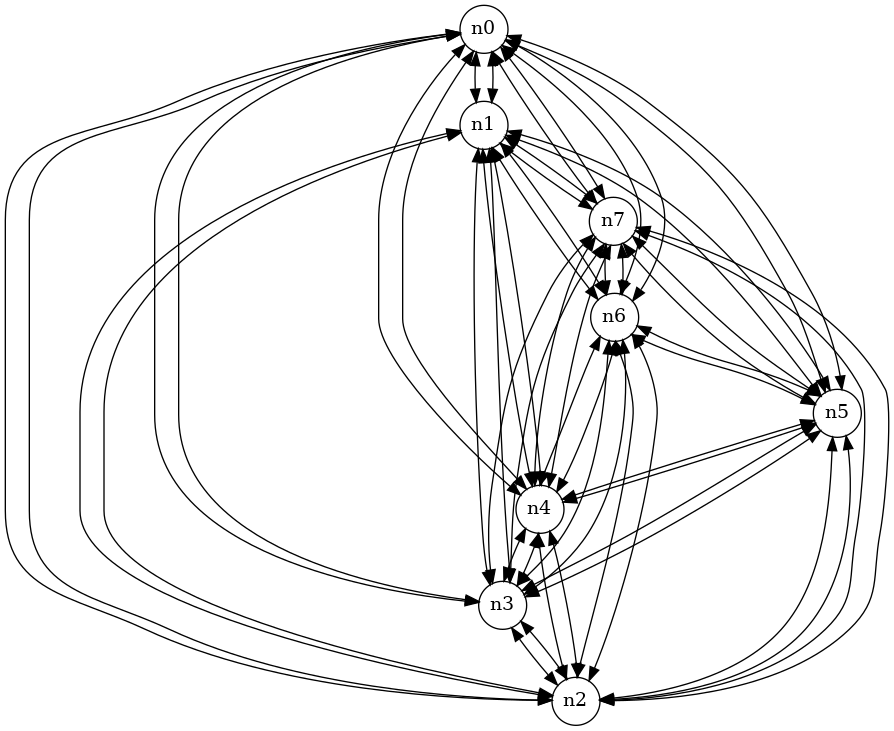
from graphviz import Graph
import math

nodes = 8
dot = Graph()

# Set the default node and edge attributes
dot.node_attr.update(shape='circle', fixedsize='true', width='0.5')
dot.edge_attr.update(dir='both')

# Define the positions of the nodes using polar coordinates
dot.node('n0', pos='0,0!')
dot.node('n1', pos='0.9239,0.3827!')
dot.node('n2', pos='0.9239,-0.382!')
dot.node('n3', pos='0.3827,-0.9239!')
dot.node('n4', pos='-0.3827,-0.9239!')
dot.node('n5', pos='-0.9239,-0.3827!')
dot.node('n6', pos='-0.9239,0.3827!')
dot.node('n7', pos='-0.3827,0.9239!')

# Create bidirectional edges between the nodes
for i in range(nodes):
    for j in range(nodes):
        if i != j:
            dot.edge("n"+str(i), "n"+str(j), dir='both')


dot.render('network_graph', format='png')


from IPython.display import Image

Image(filename='network_graph.png')
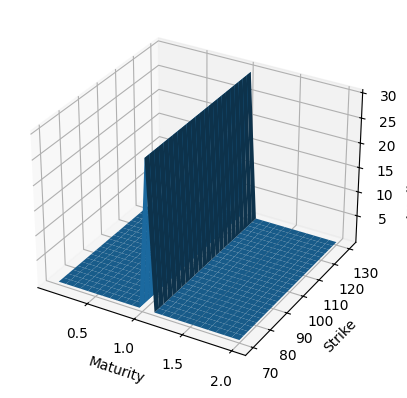
SABRのボラティリティサーフェス(コード非表示)
Graphvizモジュールでそのまま実行する方法
![digraph G1 {
graph [size="4,4"];
node [shape=diamond] d ;
node [shape=parallelogram] b c e;
node [shape=box,style=rounded] a f ;
a [label="スタート"];
b [label="Kateでtext fileを編集し、\n dotファイルを作成"];
c [label="xdotで確認"];
d [label="正しくできているか"];
e [label="sphinxに取り込む"];
f [label="エンド"];
a->b;
b->c;
c->d;
d->e [label="Yes"];
d->b [label="No"];
e->f;
}](../../_images/graphviz-44071c64d1beeab3fcbe920907e587041e1ed8dc.png)
graphvizでフローチャートを作成する際の主な流れ
Highlight word in sphinx (https://stackoverflow.com/questions/49210787/how-do-i-highlight-text-in-python-sphinx)
javascriptボタンクリックは実装できるが、chart がなぜかできない。
github actionsでgithub pages用にデプロイをスケジューリングしてあげることで、定期的にページの更新を行うことができる。例えば天気予報を取得することができる。github actionsはmainブランチからしか実装できない?
github pagesデプロイまでの流れを抑えておく必要がある。そもそも”home directoryはどこですか?”
files/figures に入れたものがdocs/_images に行く。(正しくビルドされていれば)。そしてdocsの状態のものがgithub pagesにてデプロイされる。したがって、画像はfiles/figuresに入っている必要がある。
- RSTファイルでinternal link を作る方法 (underscoreを使う):
次をrst本文中に書き込む。
.. _RBC25: //これはアンカー

    This is a link to the RST Overview: `RBC25`_. //ここがリンク
Plantuml をdocker + sphinx 環境で入れる方法
pip install する requirements.txtに入れる。
pip install plantuml
pip install sphinxcontrib-plantuml
ダウンロードしてきたplantuml-1.2023.9.jarを/root/にコピーする。DockerFileを編集する。plantuml-1.2023.9.jarをローカルからDockerのイメージにコピーしないとなぜかconf.pyからは指定できない。(マウントしているのに相対パスで読めないのはなぜ?)
# Install Java (jarを動かすため)
RUN apt-get update && apt-get install -y openjdk-11-jre

COPY ./plantuml-1.2023.9.jar /root/
RUN chmod +r /root/plantuml-1.2023.9.jar
RUN ls /root/plantuml-1.2023.9.jar
conf.pyをeditする。
extensions = ['sphinxcontrib.plantuml']
plantuml = 'java -jar /root/plantuml-1.2023.9.jar'
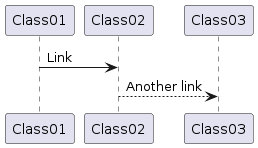
rstファイルに記入する。
.. uml::

    @startuml
    Class01 -> Class02 : Link
    Class02 --> Class03 : Another link
    @enduml
以下の図を得る。